Toolset
Download & Extract the toolset for Dichen V4/V5/V6 Fuser
Monitor Asset Manager
Download Monitor Asset Manager from Official
What to prepare
- A Main PC (Gaming PC) with an HDMI port, capable of outputting the required resolution and refresh rate.
- A Second PC (Cheat PC) with an HDMI port, capable of outputting the required resolution and refresh rate.
- 3 HDMI cables, capable of outputting the required resolution and refresh rate.
Setup Instruction
① Get EDID File
- Use an HDMI cable to connect the Main PC (Gaming PC) and the Main Monitor.
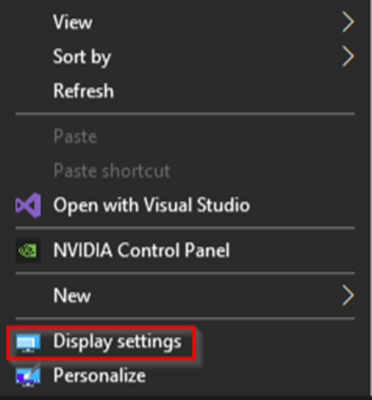
- Right Click on your desktop and click
Display Settings.
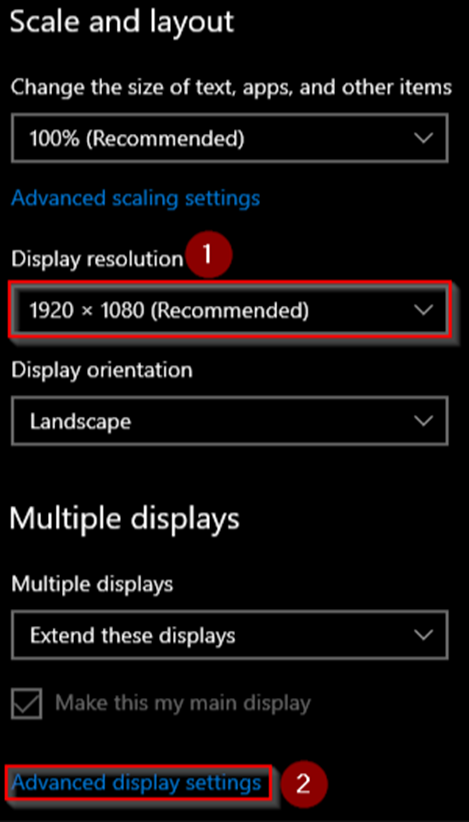
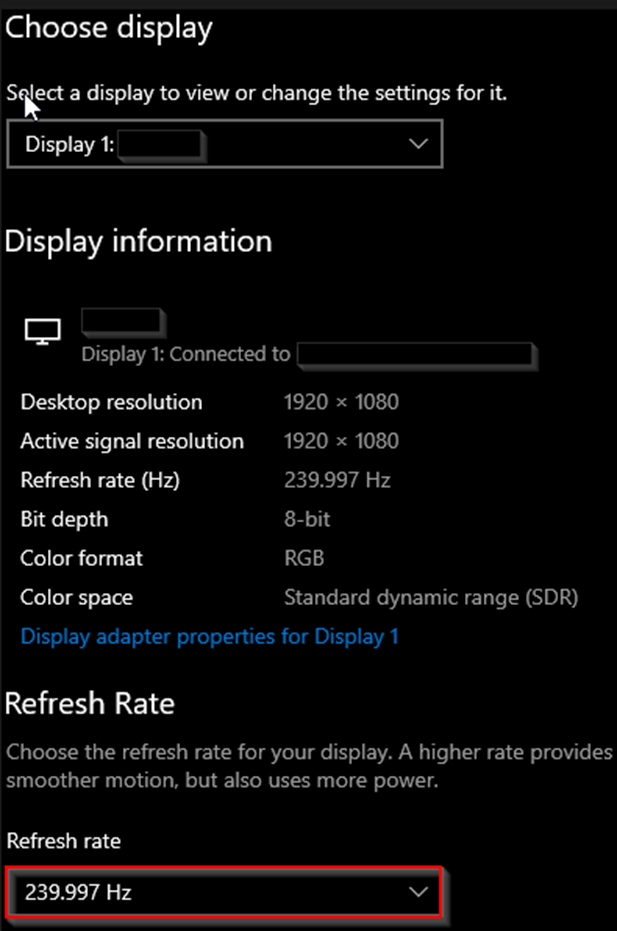
- Change to your desired solutions and hz (Recommend set to max settings of your monitor). For example, if you like to use fuser at 1080p240hz, set display to 1080p + 240hz.
- Extracting .bin (EDID File).
- Download
Monitor Asset Manager Setup.exeand save it wherever you’d like. - Run
Monitor Asset Manager Setup.exeand complete the installaion. - If it doesn’t auto-launch after install then search for
Moninfoin your Windows Search Bar and run it asAdministrator.
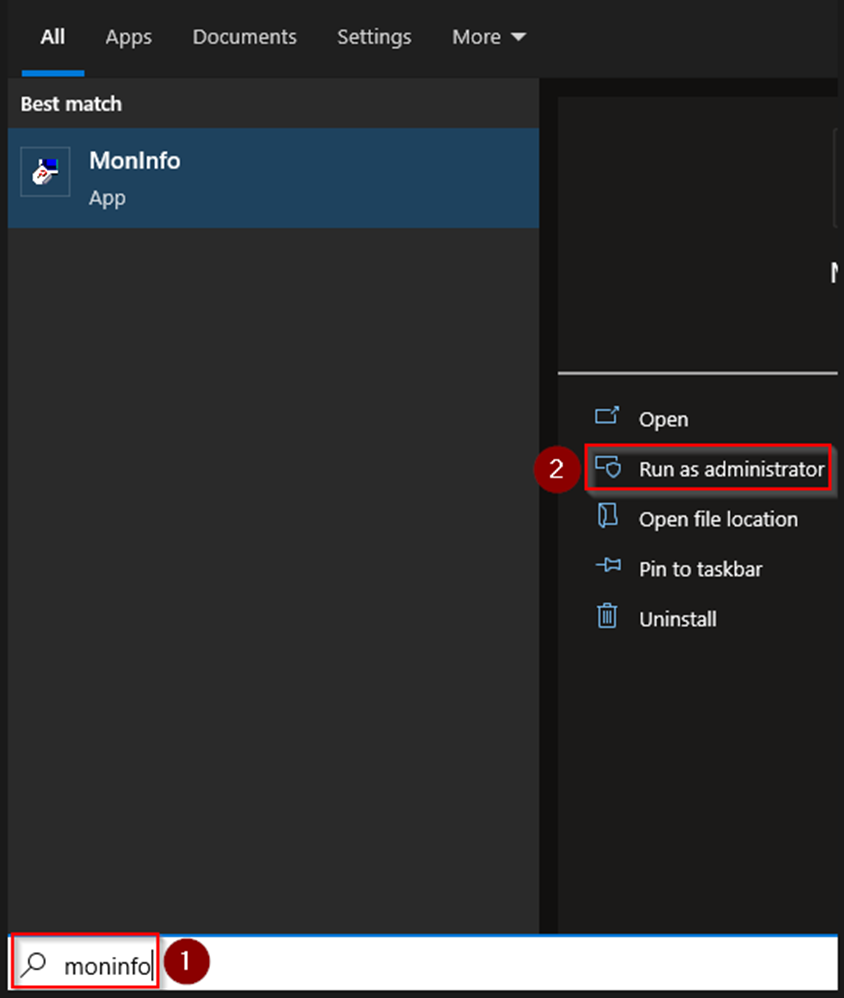
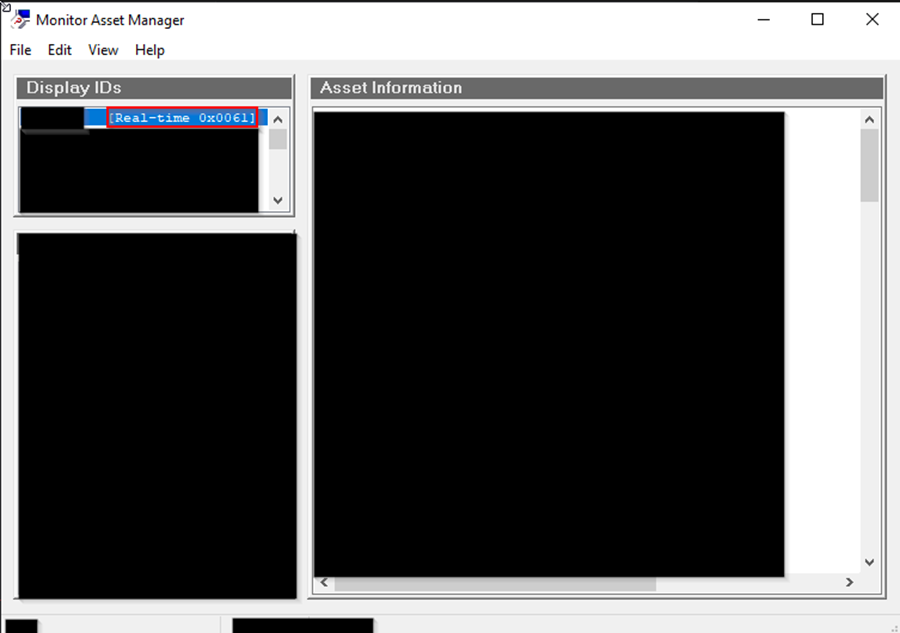
- Make sure
Real-timeis selected.
- Click
Fileand thenSave as...
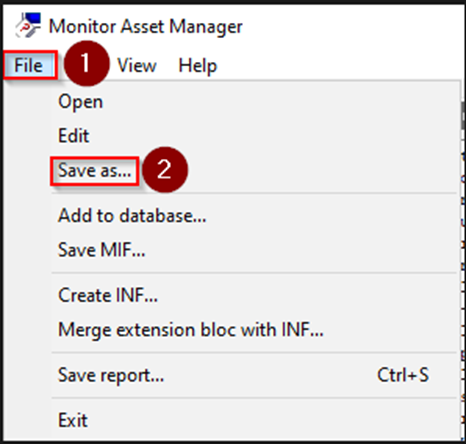
- Save it wherever you like and name it whatever you prefer. The desktop is usually the easiest option.
② Inject EDID into Fuser
-
Setup Fuser
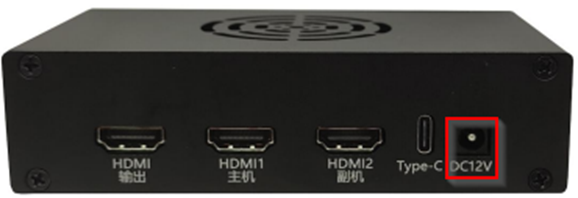
- Conenct the power cable provided with the box to the fuser and turn on the power.
- You should see the first light “D1” turn on (if it doesn’t turn on press the big red power button)
- Connect the data cable & Install the driver
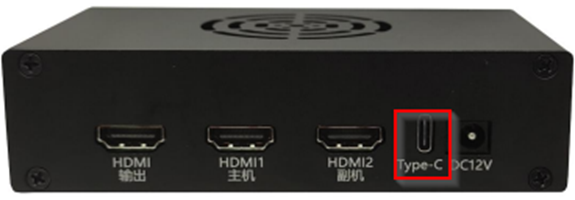
- Grab your USB-C to USB-A cable.
- Plug in USB-C end to your fuser; USB-A end into your Main PC (Gaming PC).
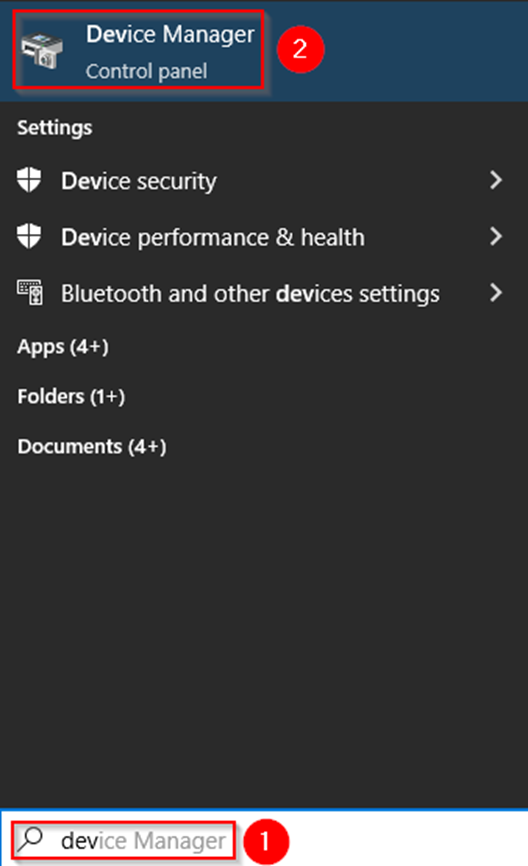
- Search
Device Managerin your windows search bar and open it.
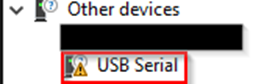
- It should look like this under
Ports (COM & LPT). If it does, skip to the next big step. If it doesn’t, continue to Step 7.
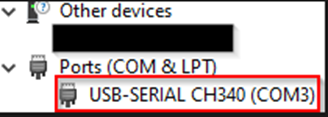
- If it doesn’t and show as
USB Serial, completeDriver Install.
- Install Driver
CH340 Driver
CH340 Driver for Kmbox
- Download the
CH340 Driverfrom above.- Extract the folder and open the extracted folder.
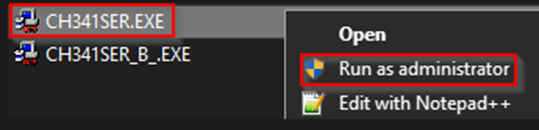
- Right click the
CH341SER.EXEand clickRun as Administrator.
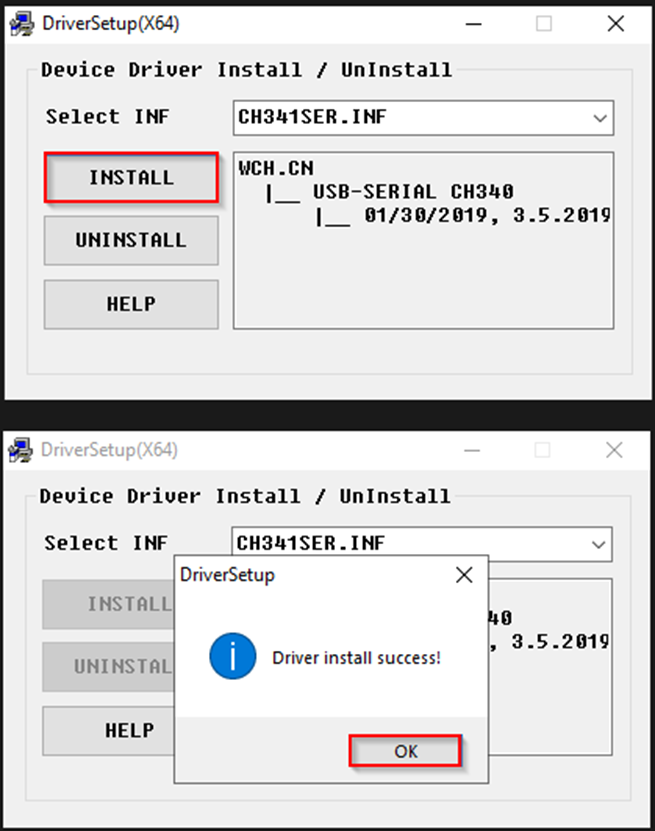
- Click
INSTALLand thenOK.
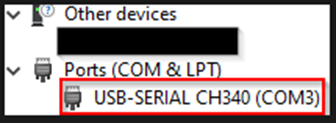
- Now go back to
Device Managerand you should see your fuser show up under Ports (COM & LPT)- Take note of the COM port it’s on. For example, mine’s on COM3 (if you have multiple COM ports showing, just unplug your fuser and see which one dissapears, then re-plug it in)
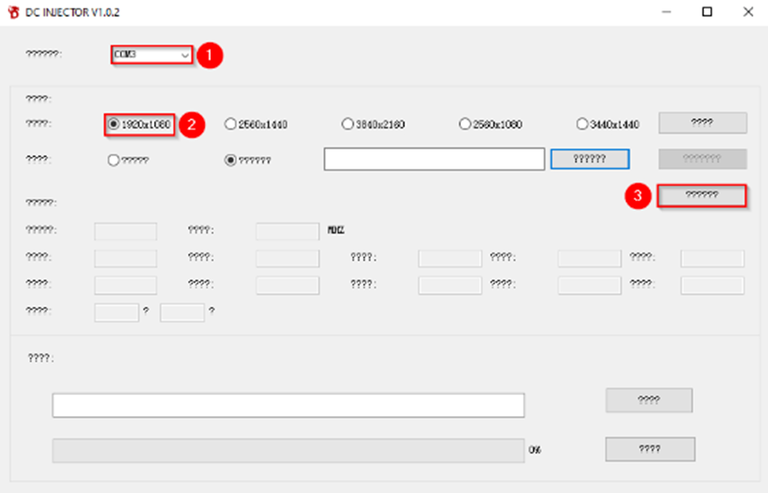
③ Inject EDID
EDID Injector
Dichen EDID Injector
- Download EDID Injector from above.
- Save it wherever you’d like and right click it and click
Run as Administrator.

- Select the correct COM port.
- Select your desired resolution. For example, I want 1920x1080.
- Click that button (it’s the automatic easier injection).
- Click that button to browse your files and select the
.binyou saved earlier. - Click that button to inject.
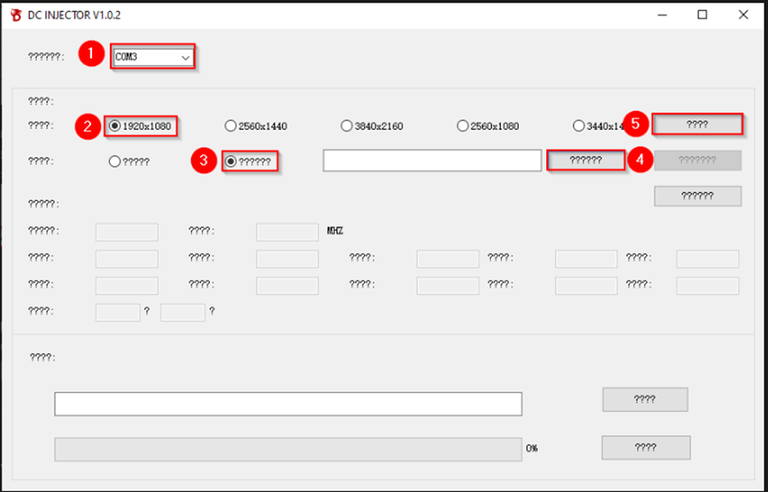
- You’ll see some random characters pop up, that’s fine. Close the dialog boxes and you can close all previously used applications and windows
- Unplug your USB-C to USB-A cable from the Main PC.
④ Configuration
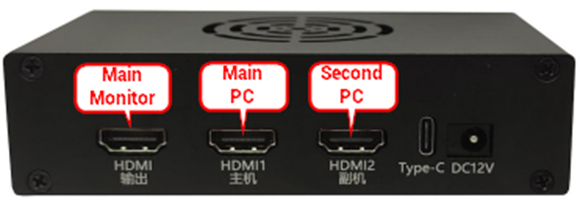
There are 3 Ports on the fuser. Grab your 3 HDMI cables and plug them in as follows:HDMIgoes to the Main Monitor.HDMI1goes to Main PC (Gaming PC).HDMI2goes to second PC (Gaming PC).
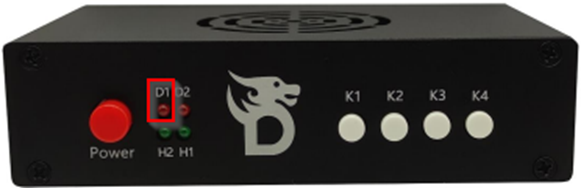
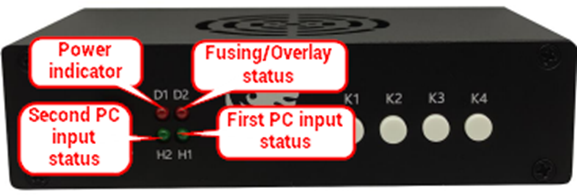
⓪ Meaning of Indicators
- D1 - Power indicator. If the light is on it has power
- D2 - Fusing/Overlay status. If the light is on it means the fuser is overlaying the second PC’s output
- H2 - Second PC input status. If the light is on then it means the fuser is getting a signal from the second PC.
- H1 - Main PC input status. If the light is on then it means the fuser is getting a signal from the main PC.
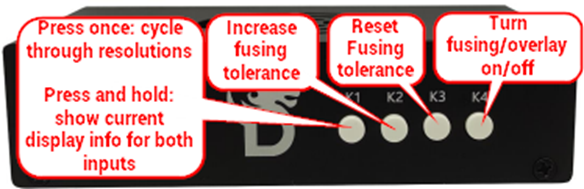
- K1 - Press it once: cycle through resolutions. It should default on 1080p. Press the button to cycle until you reach your desired resolution. Press and hold: Show current input information like resolution and refresh rate.
- K2 - Increase the fusing strength/tolerance. The higher it goes, the more of the gray it will delete during fusing.
- K3 - Resets the fusing strength/tolerance to default. This is what I use. It works nicely for every cheat I’ve tried.
- K4 - Toggle fusing/overlay.
Some Problems Solve
Multiple Monitors
If you want, you can plug in multiple monitors to your second PC. For the easiest usage:Use Case
- Some DMA software uses Client Mode (menu and radar integrated into one software), and this type of product is best used with a Second PC (Cheat PC) outputting two HDMI connections.
- Users who want a dedicated screen for viewing the radar. (Users can also access the radar directly on their other devices within the same local network.)
- Your Second PC (Cheat PC) must have atleast two video output i/o (HDMI / DP) and a Second Monitor.
- Some products have a monitor selection option, so you can directly using that settings without this setup.
- First, your second PC (Cheat PC) should have two HDMI ports, each connected to:
- Fuser
- Second Monitor
- On your Second PC (Cheat PC), go to
Display Settings, and you should see two monitors appearing in the settings.
- Choose the screen that outputs the display to the fuser. To identify it, click the
Identifybutton, and a number should appear in the bottom left corner of each monitor.
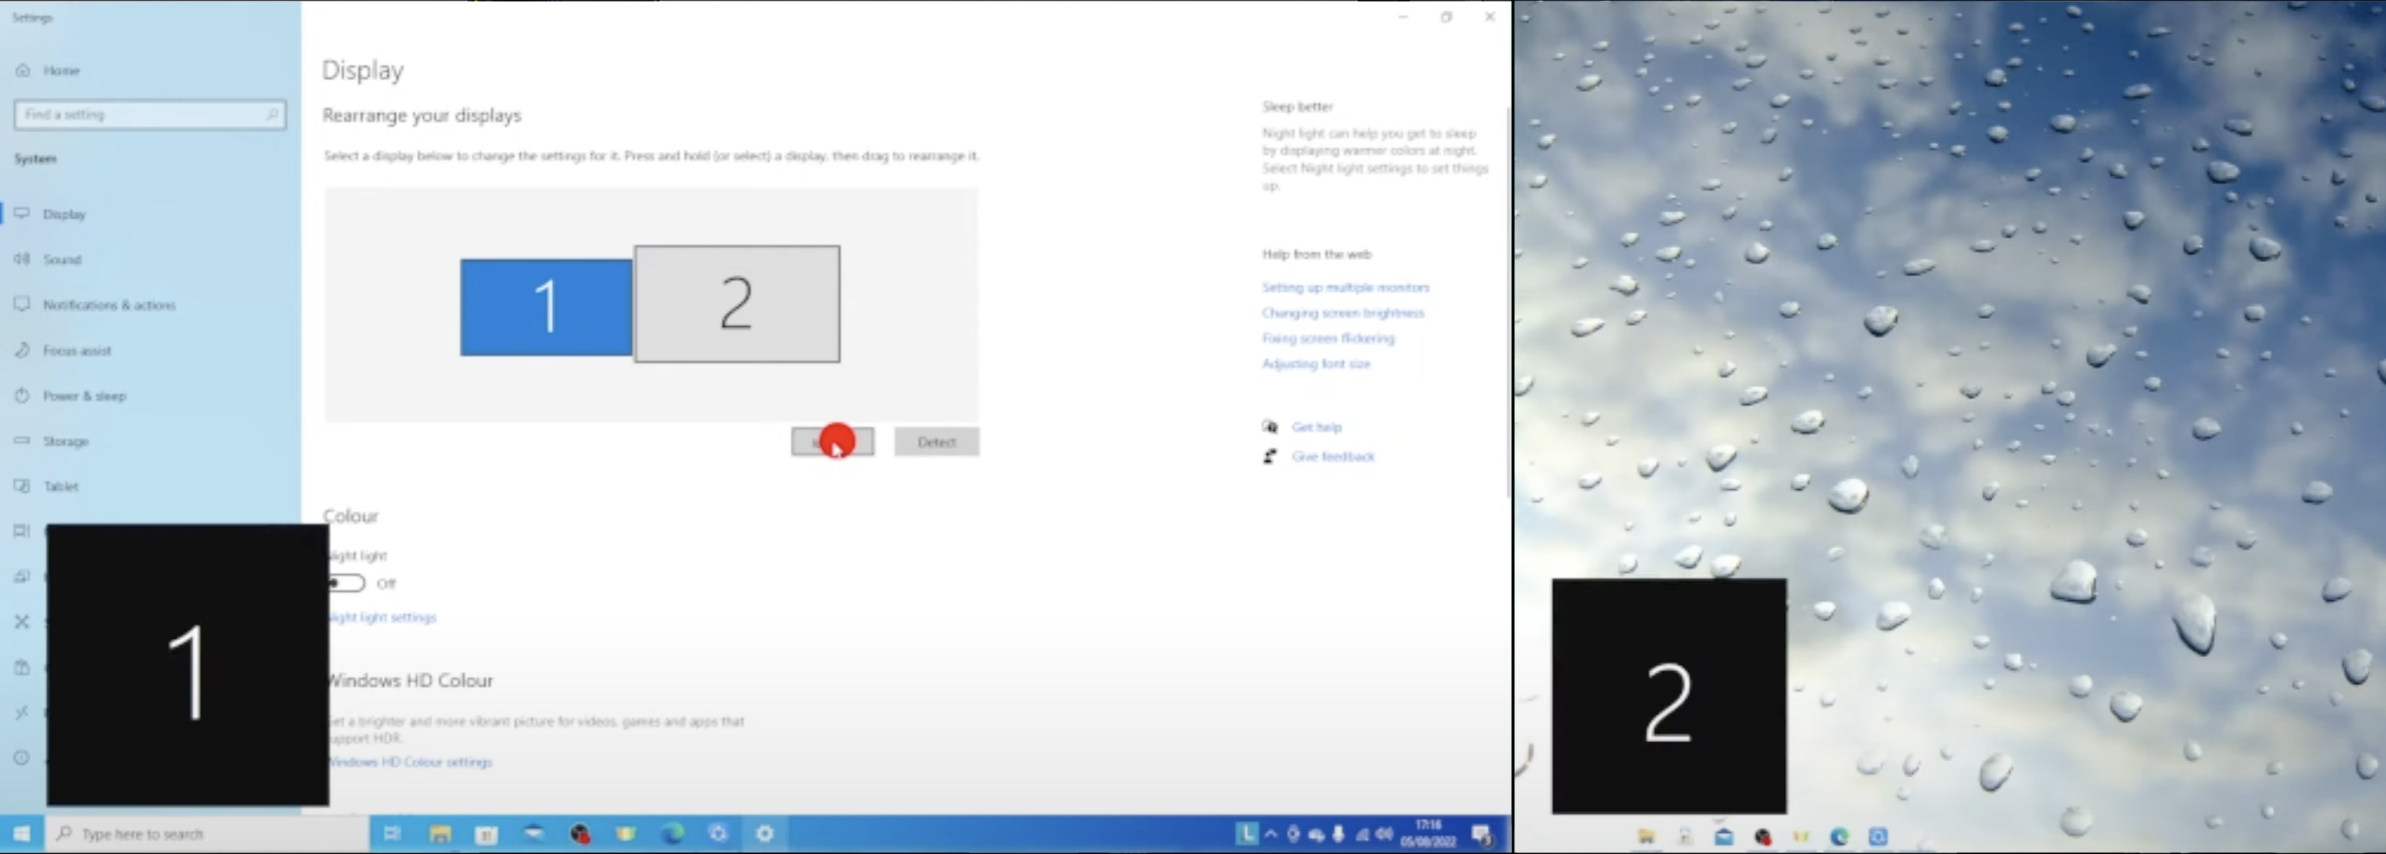
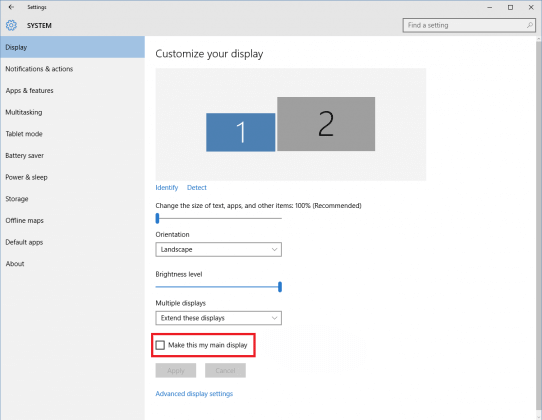
- Select the Fuser Output Monitor, tick
Make this my main display.
- Setup is now complete. When running the DMA Software, the Main Display should default to showing ESP and Wallhack. Drag the Radar Client windows to the second monitor, and it will work perfectly.
Reset the Fuser
If you want to reset the fuser back to factory setting (you might do this if your EDID isn’t working and you’ve exhausted all options), just plug the fuser back in via the USB-C to USB-A cable and do this:- Select the correct COM port.
- Select the desired resolution.
- Click the third button.